Tutorials for Module “CMDB”
In this article:
Creating Your First CMDB Class
For full reference see CMDB2SCCM.
Note
You have to be able to “Edit Settings”.
- Go to the tab “Settings”
- Navigate to CMDB and click on the plus button at the bottom
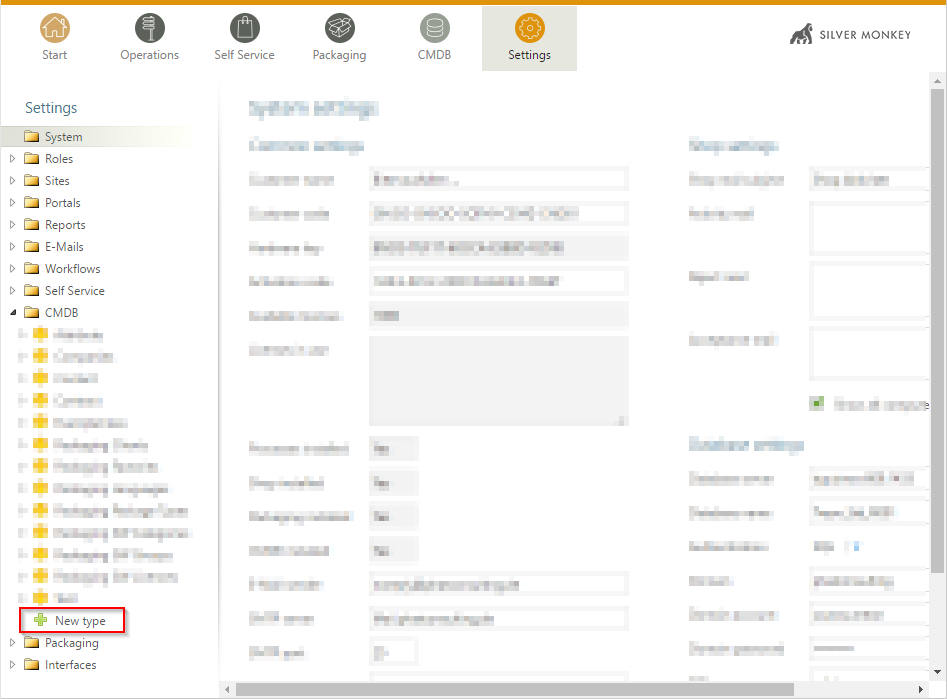
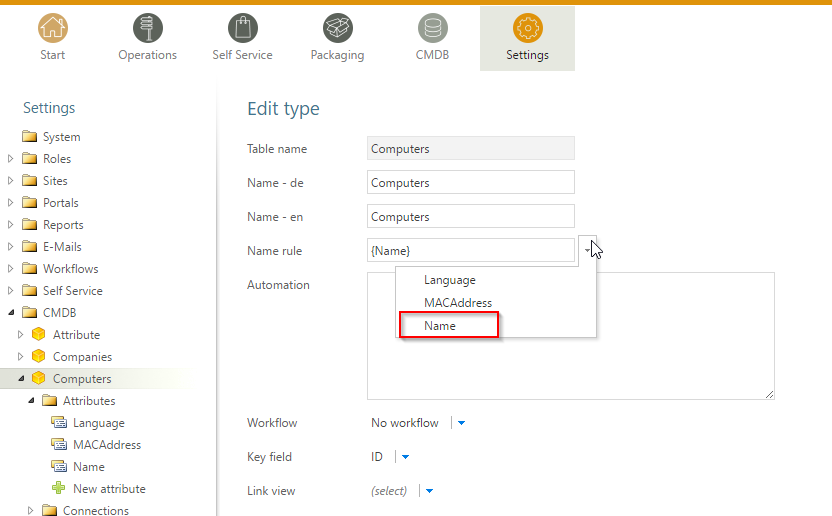
- Create a new CMDB class called “Computers”:
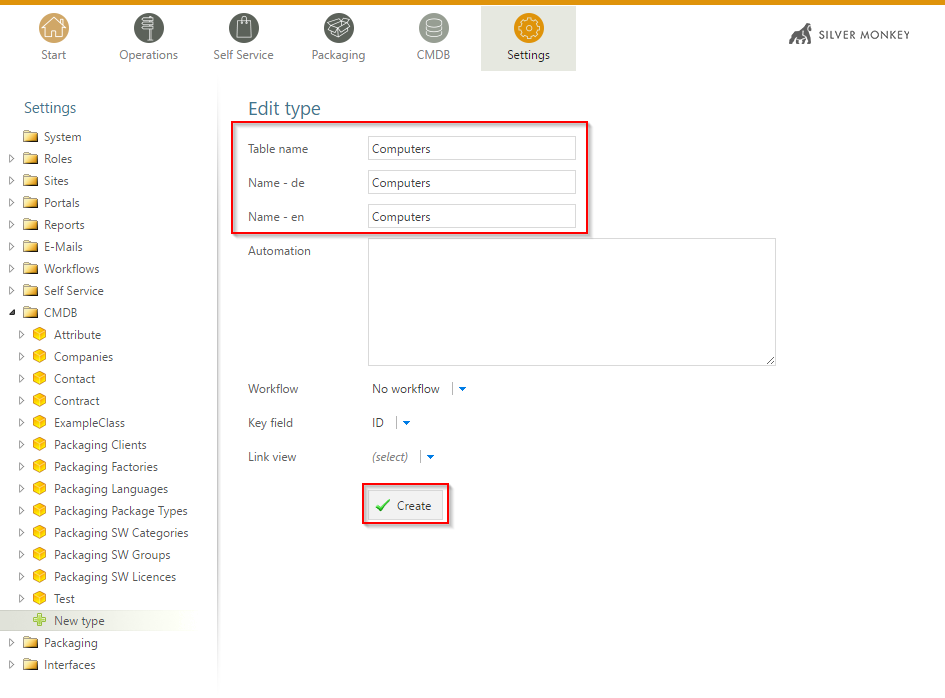
3.1. Field Automation is used for automatic triggering of MSSQL Scripts (e.g. Stored Procedures) or external processes (e.g Powershell Scripts). See example:
<trigger>
   <afterUpdate field="" value=""
      command=" exec sp_MyStoredProcedure @Id='{Id}' "
   />
   <afterUpdate field="" value=""
      title="createTicketAuto"
      script="C:\Windows\system32\WindowsPowerShell\v1.0\powershell.exe"
      arguments="C:\SilverMonkey\v5\Scripts\MyTriggerScript.ps1 -Id {Id}"
      condition="{SysStatus} = A0.1 - Request"
      restart="false"
      back="true"
   />
</trigger>
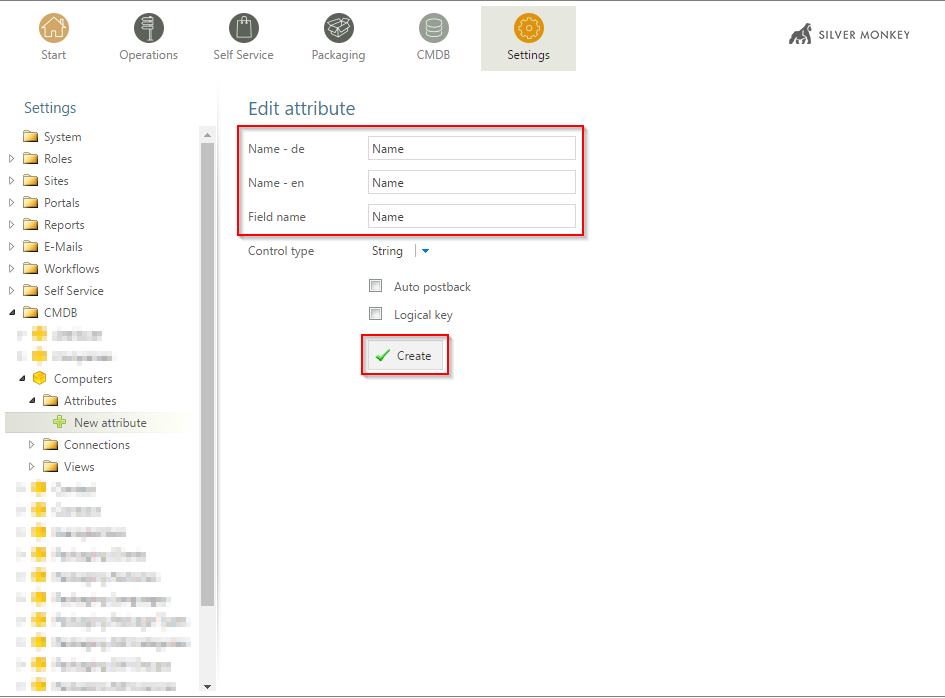
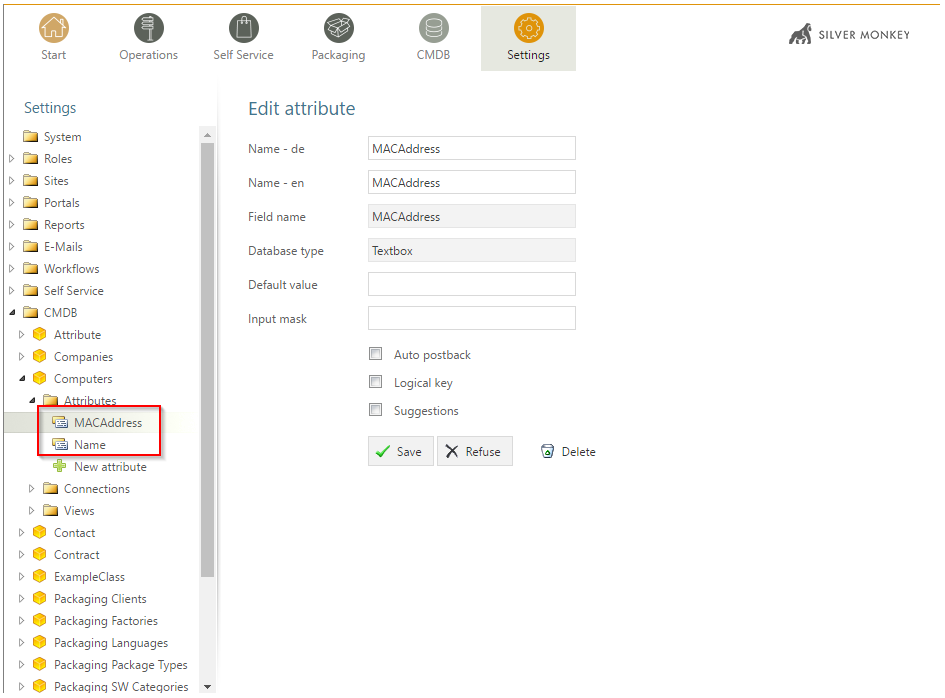
- Create your first attributes and name them “Name” and “MACAddress”:
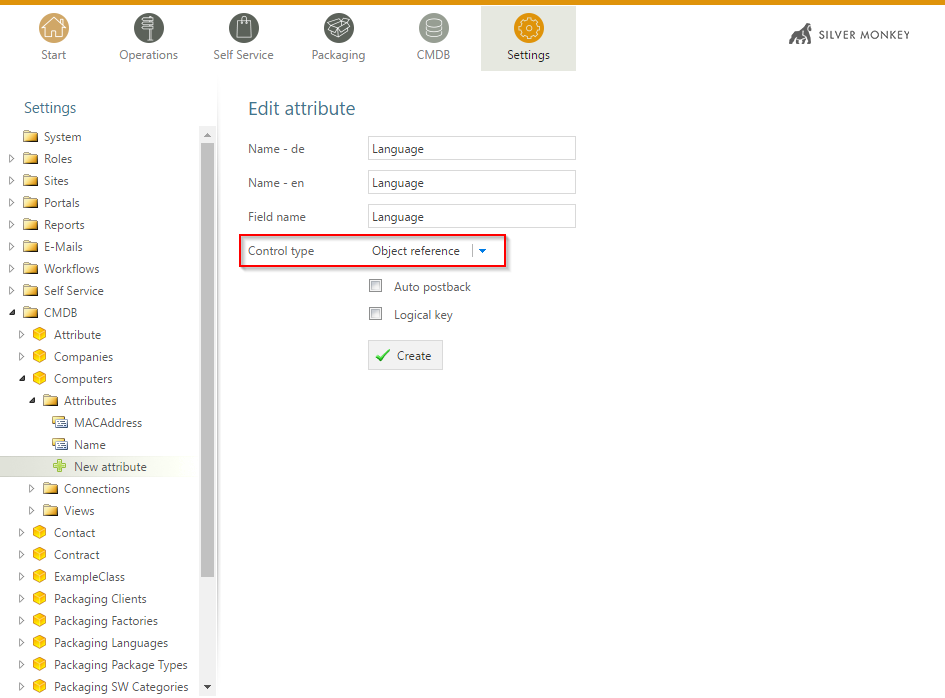
- Create an attribute of the type “Object reference” and set the reference to another custom CMDB Class “Packaging Languages” (It will be good practice for the subsequent tutorial):
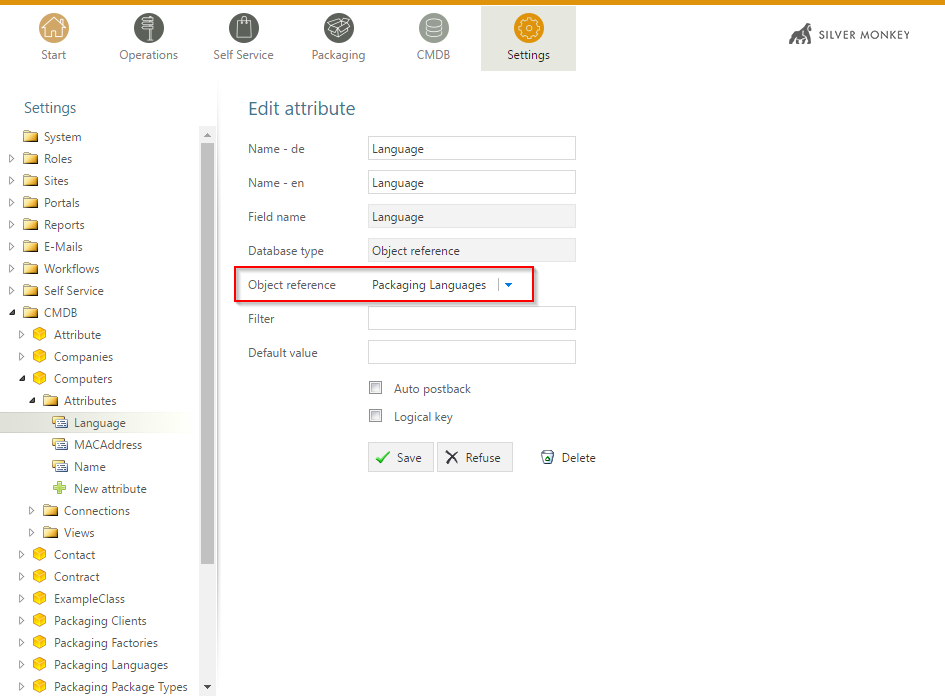
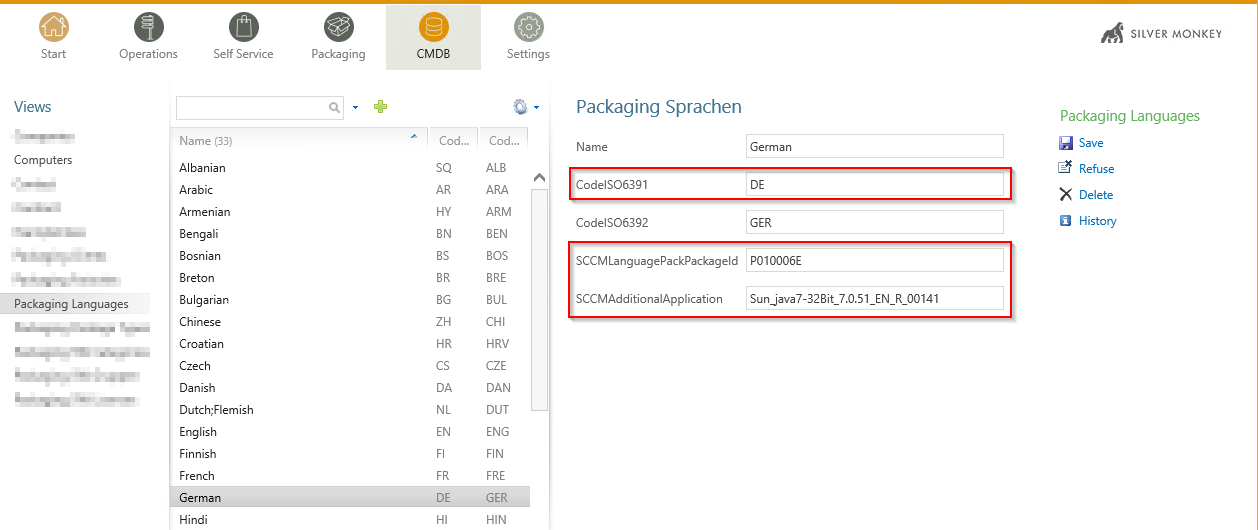
The Language class is set up as follows:
- Set up naming rule
The setting name rule defines how the internal database column SysDisplayName is set. It contains important single column popups like the object reference chooser.
- Create a list view
Note
There are two different types of views. One is called “List” and the other one is called “Forms”. Lists display multiple elements of a CMDB Class. When clicking on an item, the configured form will be opened to view or edit the item.

Configure the list as shown:

Note
- The setting
detailView="Computers Details"will expect a form view with the name “Computers Details” - The setting
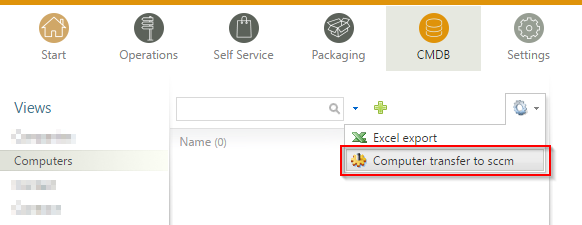
cmdb2sccm="true"displays a transfer button in the list context menu
- For full reference see <view> Definition
1 2 3 4 5 6 7 8 9 10 11 12 13 14 15 16 17 18 19 20 | <?xml version="1.0"?>
<views>
<view
splitterWidth="550"
detailView="Computers Details"
newLink=""
viewPane="true"
refresh="false"
excelExport="true"
importExport="false"
cmdb2sccm="true">
<columns>
<column field="Name" width="200"/>
<column field="MACAddress" width="-1"/>
</columns>
<data>
<condition>{search}='' OR Name like {search}</condition>
</data>
</view>
</views>
|
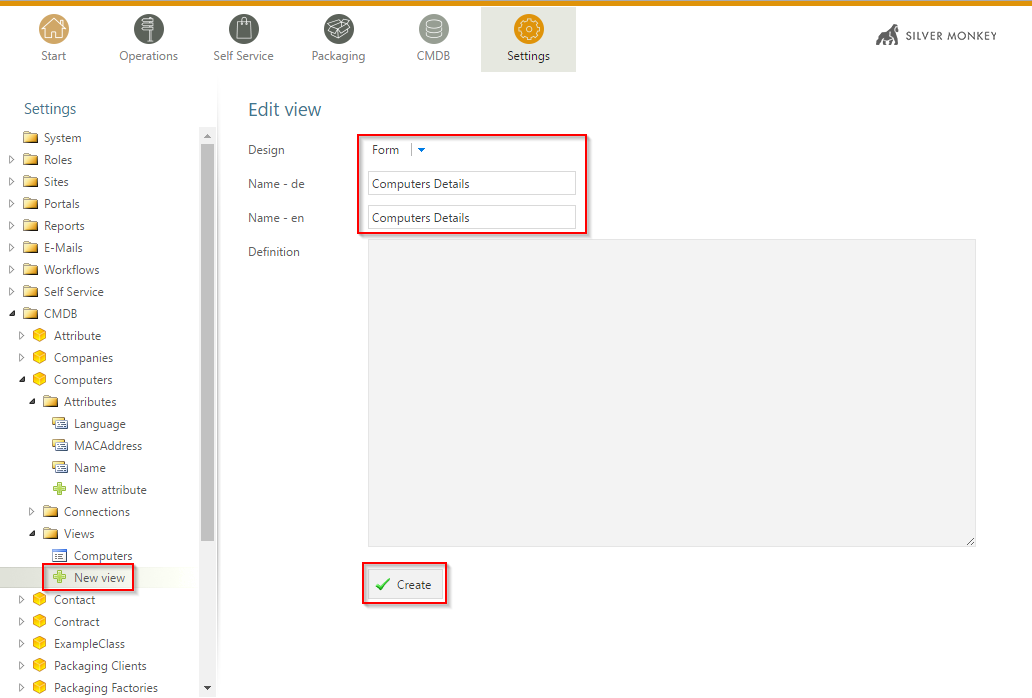
- Create a form view
Create a new form view as shown below (you have to stick to the configured name from the list view detailView="Computers Details"):
A set of attributes and form elements are automatically suggested. You can delete the <connections link="true" /> line as no connections are configured in this example.
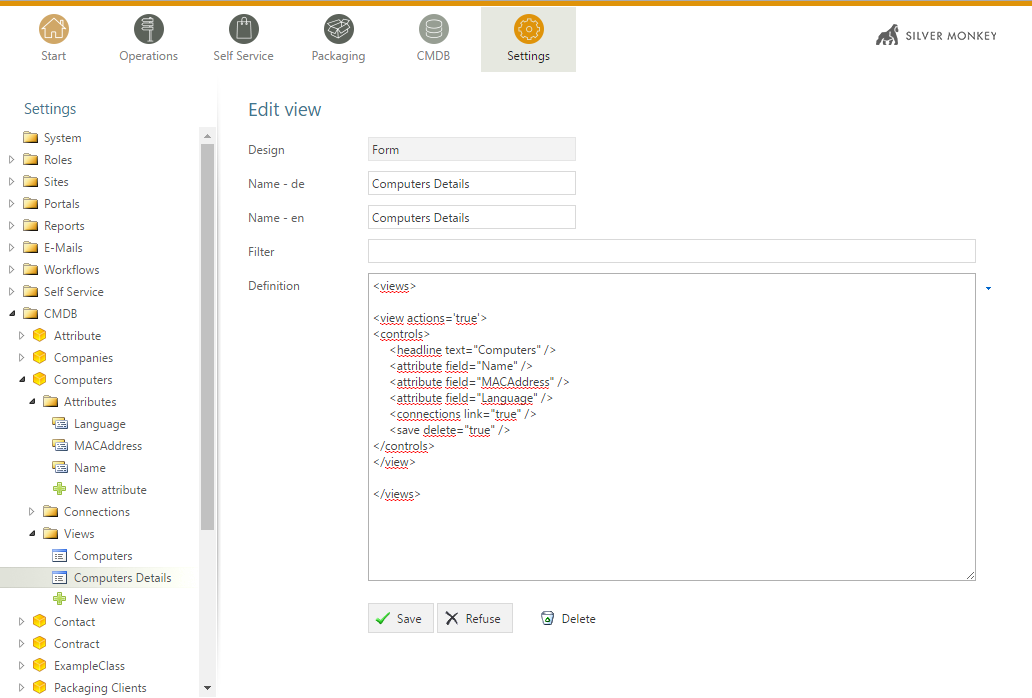
Add an action called “CMDB2SCCM” to the form. The final result of the form looks like this:
1 2 3 4 5 6 7 8 9 10 11 12 13 14 15 16 17 18 | <views>
<view actions='true'>
<controls>
<CMDB2SCCM
title="Transfer Computer to SCCM"
param="SingleTransfer"
restart="true"
/>
<headline text="Computers" />
<attribute field="Name" />
<attribute field="MACAddress" />
<attribute field="Language" />
<save delete="true" />
</controls>
</view>
</views>
|
When you go to CMDB you can have a look at the result of our list and form:
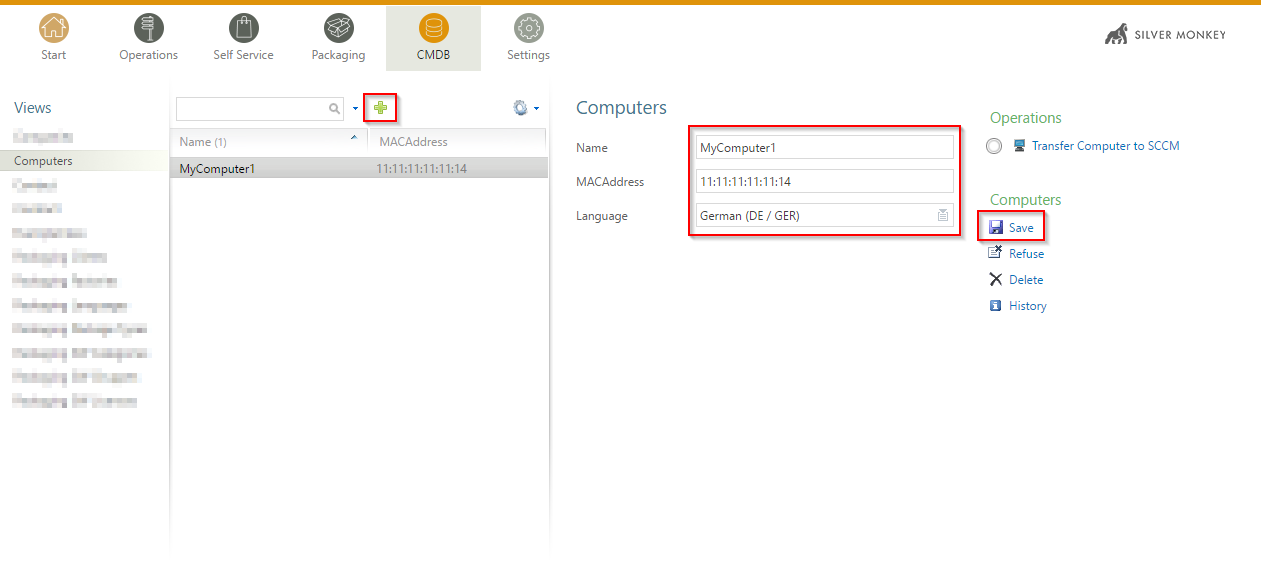
You can add more attributes to the class and use those attributes in lists and forms as you need.
Setting up Mass Import for ConfigMgr
For full reference see CMDB2SCCM.
Note
This tutorial is built up on the database schema of the tutorial Creating Your First CMDB Class.
You have to get the following information to built up an import for SCCM:
- SCCM collection names the computer has to be member of
- Needed computer variable names and accepted values
- Knowledge of the SIM database schema
- Follow the manuall ” Creating Your First CMDB Class “
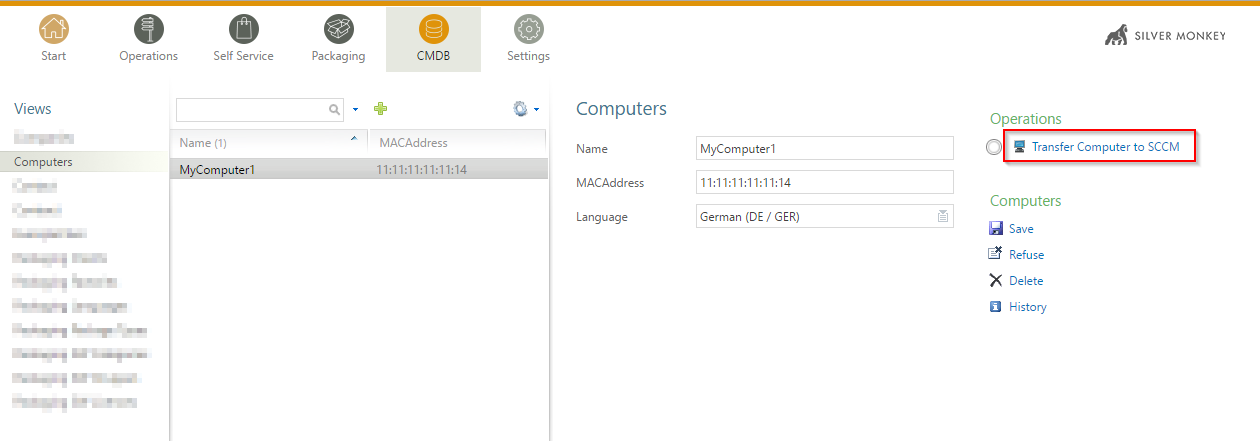
- Follow the ” SCCM Transfer “
- Create a dummy computer and click on “Transfer computer to SCCM”
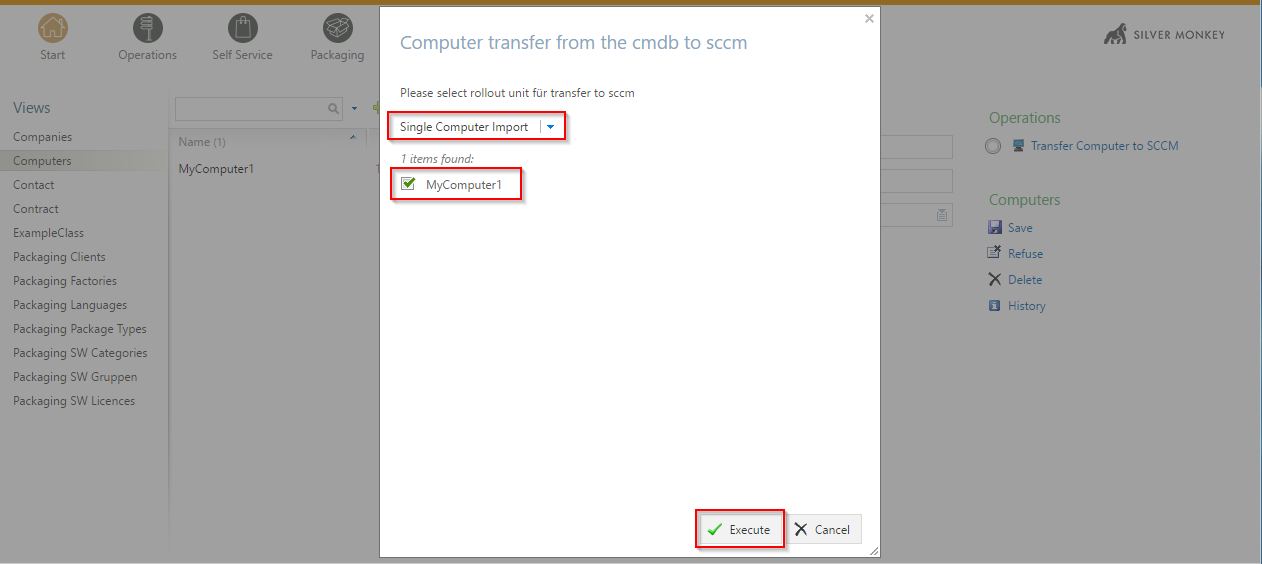
- First, select “Rollout unit” (usually, rollout units only make sense when importing multiple computers; the example below is simplyfied) and click on execute
- When the action is performed in SQL level the following results will be translated by the mass import feature:
- Computer Query
- Package Query
- Application Query
- Variable Query
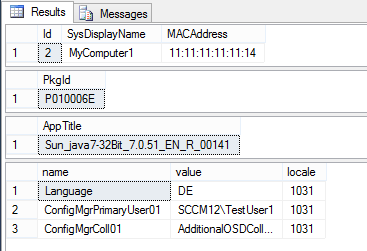
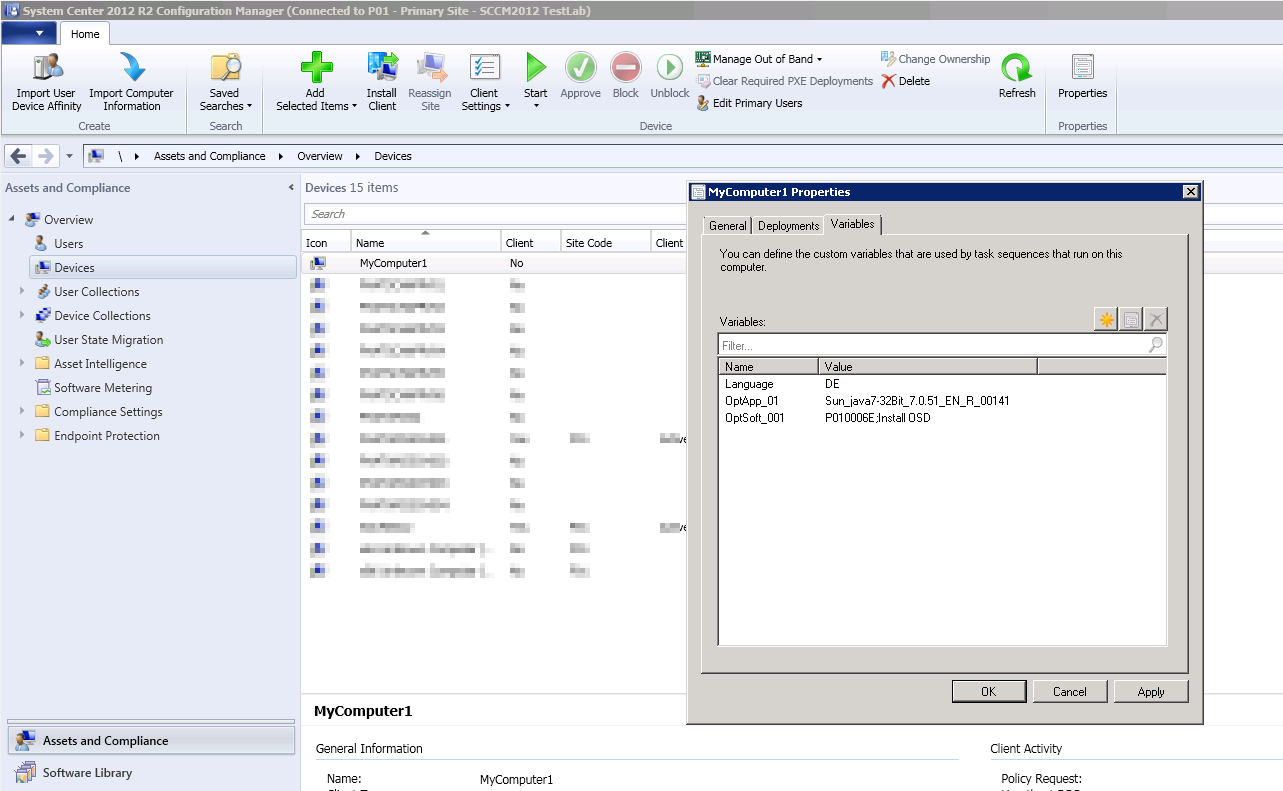
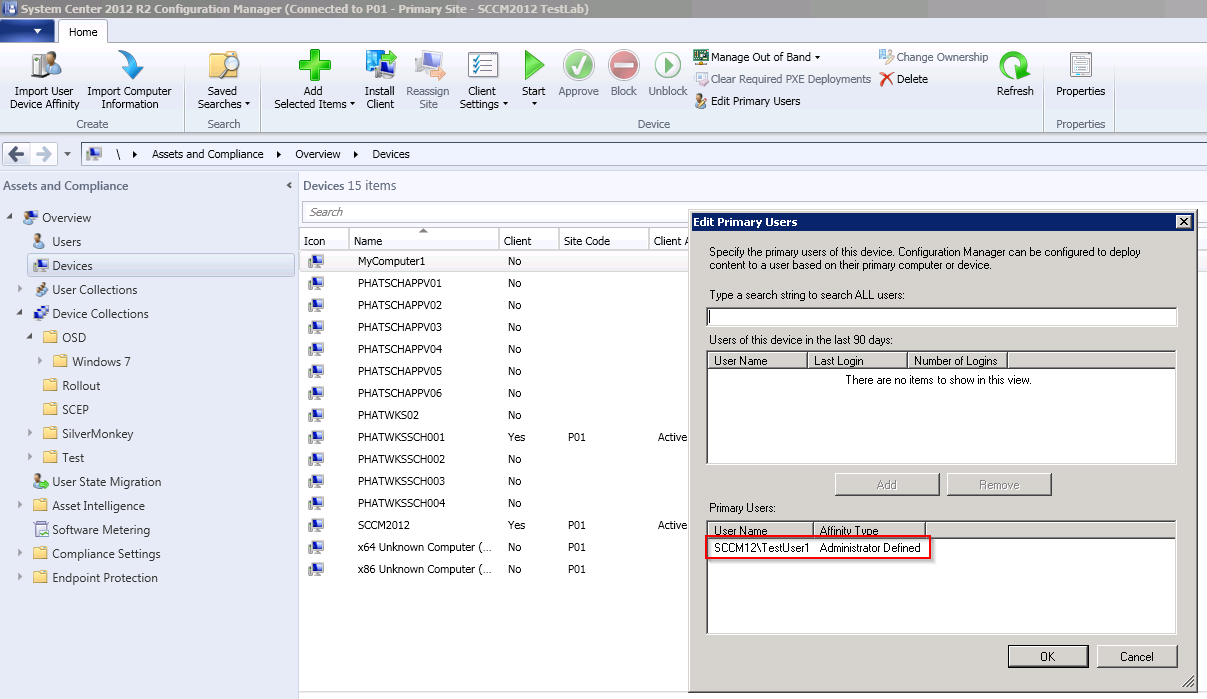
- The result in SCCM looks like the following:
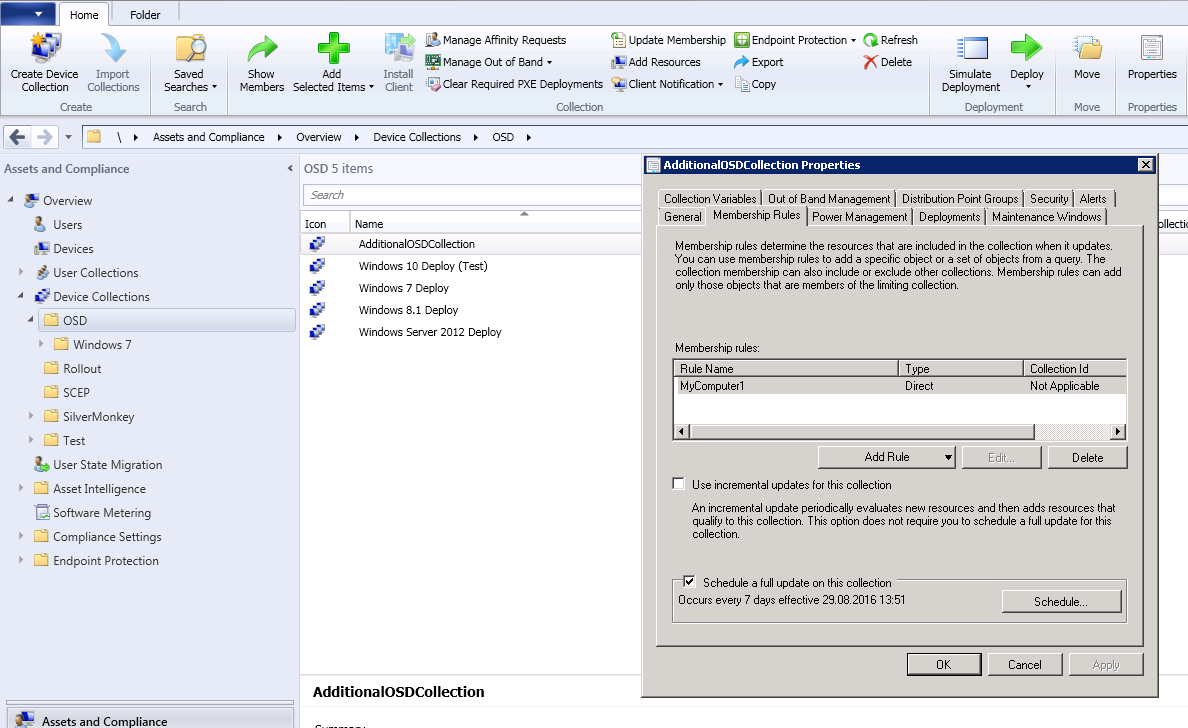
Variables:
Primary Users:
Collection membership: